RNNoise: The Open-Source AI That Finally Killed Microphone Background Noise
There’s a specific kind of shame that comes from joining a Zoom call and watching people’s faces tighten in real time.
You know the look — the slight squint, the polite “Hey, can you mute when you’re not talking?” That was me, two years ago, calling in from a home office that shared a wall with a neighbour who apparently ran a small engine repair business from his garage. Every podcast recording I did, every client call, every voiceover session — all of it contaminated by a persistent, low-frequency mechanical hum that no amount of acoustic foam seemed to fix.
I tried everything. I bought a new microphone (a Rode NT-USB, which is genuinely excellent — and still picked up the hum). I repositioned my desk. I bought heavy curtains. I draped moving blankets over everything like some kind of deranged audiophile ghost. Nothing worked well enough.
Then I discovered RNNoise, and it was like someone had quietly reached into my recordings and erased the outside world. In this guide, I’ll explain exactly how RNNoise works, how to set it up on any platform, and — if you want results without any installation — how to use a free online RNNoise-powered tool to clean your audio in seconds.
This guide is everything I wish someone had handed me the day I first Googled “how to remove background noise from microphone.”
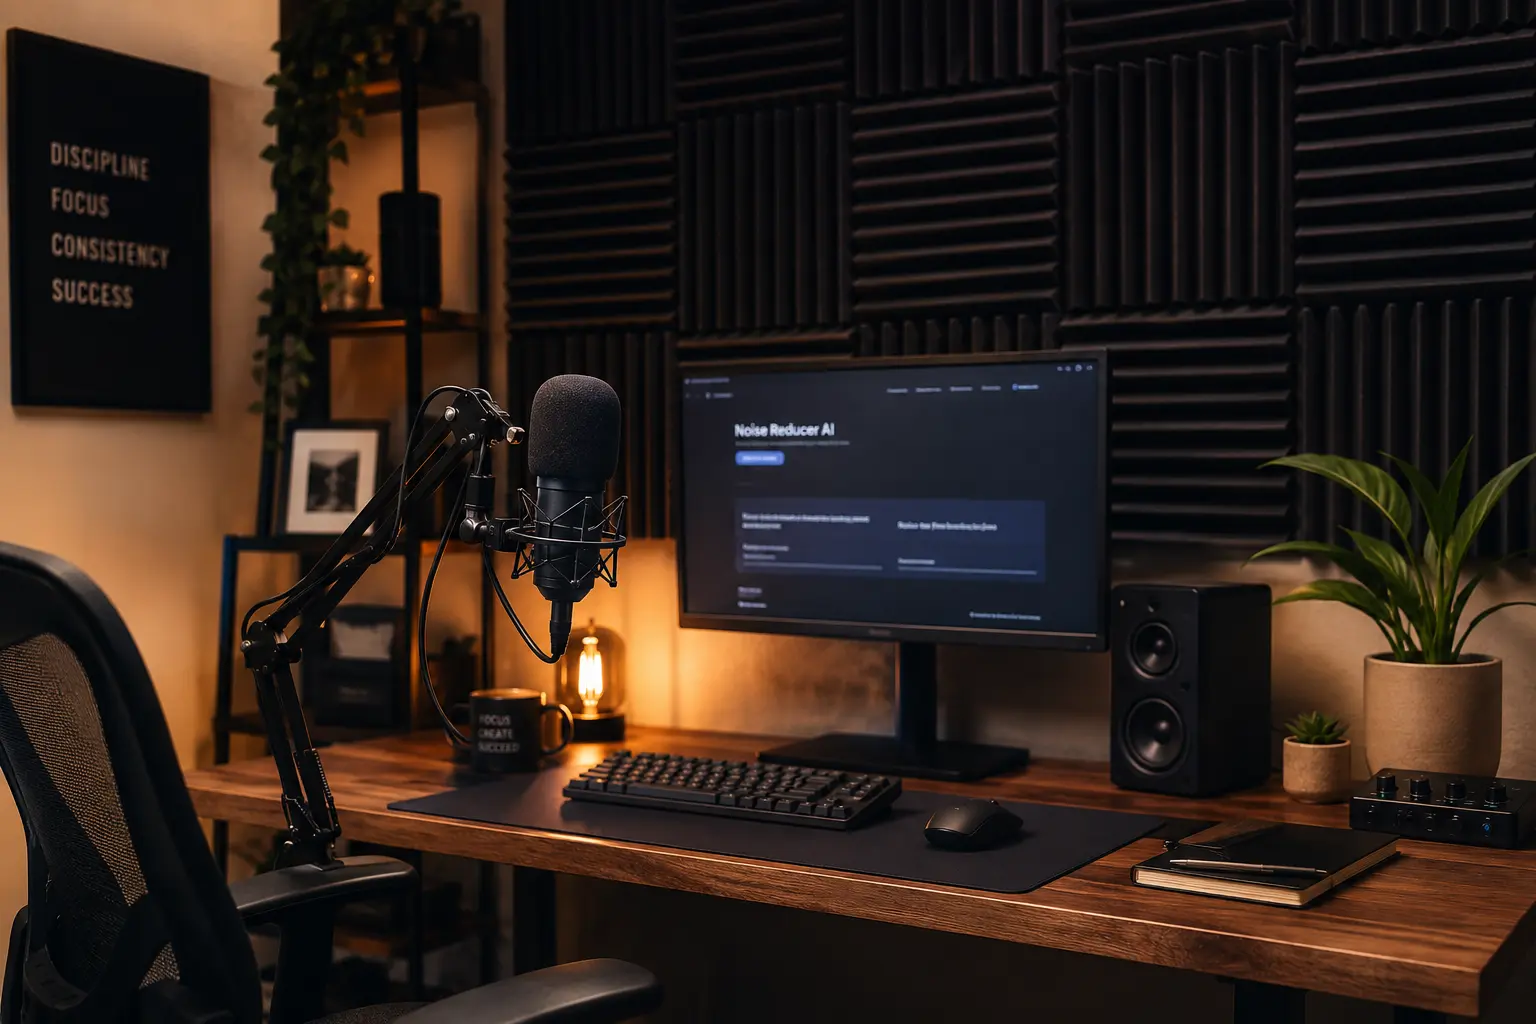
What Is RNNoise, Actually?
RNNoise is a noise suppression library developed primarily by Jean-Marc Valin, one of the engineers behind the Opus audio codec (which powers voice in Discord, WhatsApp, and most modern VoIP applications). It was originally developed at Mozilla and is now maintained as an open-source project.
At its core, RNNoise uses a recurrent neural network (RNN) — specifically a combination of a Gated Recurrent Unit (GRU) and a traditional signal processing pipeline — to classify and suppress noise in real time. That technical description matters less than what it actually does: it listens to your audio, identifies the parts that are “not voice,” and removes them frame by frame, 10 milliseconds at a time.
The reason RNNoise stands apart from older noise suppression methods isn’t just that it uses AI — it’s how it uses AI. Traditional noise gates and spectral subtraction tools work by measuring noise during a “quiet moment” (a noise profile) and then subtracting that frequency pattern from the rest of the audio. This works reasonably well for consistent background noise, but falls apart with variable noise: traffic, keyboard clicks, HVAC that cycles on and off, a dog barking down the street.
RNNoise doesn’t need a noise profile. It was trained on thousands of hours of real-world noise samples, so it already knows what most common noise sounds like. More importantly, it knows what human speech sounds like and works to preserve it even when the noise is complex or changing.
If you’d rather skip the technical setup entirely, Noise Reducer AI uses the same AI-powered noise suppression technology — just upload your file and get clean audio instantly, no installation needed. Try it free →
How RNNoise Actually Works (Without the PhD Required)
Understanding the architecture helps you set realistic expectations for what RNNoise can and cannot do.
The audio input is split into 22 frequency bands that roughly correspond to how human hearing perceives sound (known as the Bark scale). A neural network then looks at each frame of audio and predicts a “gain” value for each frequency band — essentially, how much of that band’s signal is voice versus noise. The network has memory (via the GRU layer) which means it can use context from previous frames to make better predictions.
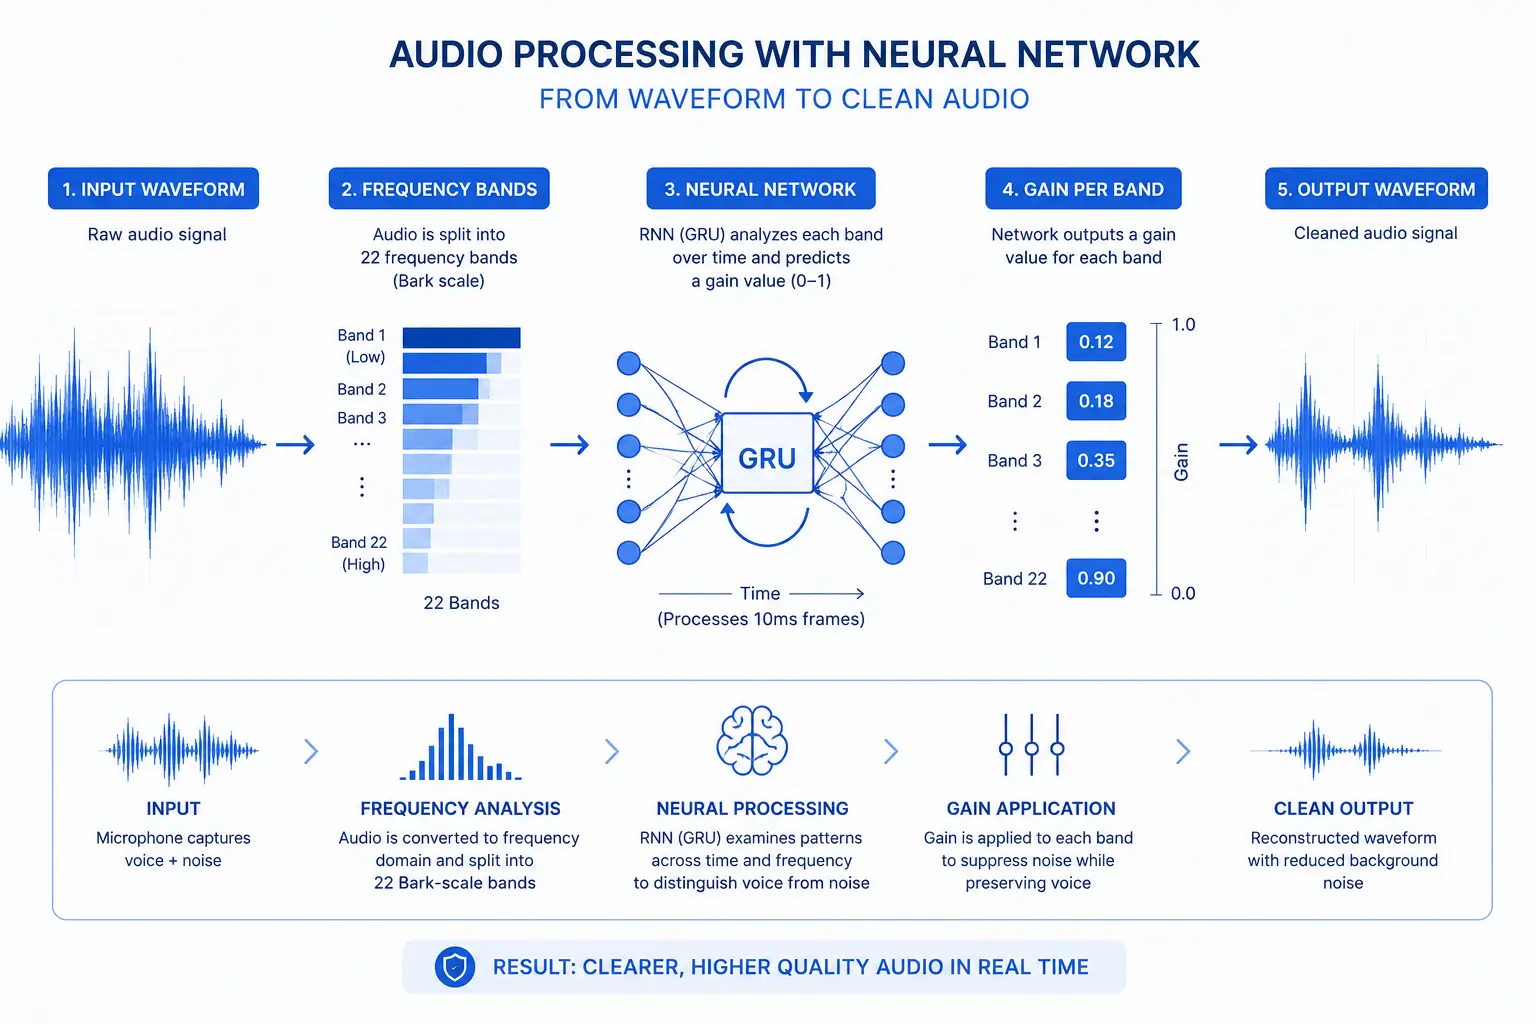
This is fundamentally different from a noise gate, which simply cuts audio below a volume threshold. RNNoise operates spectrally — it can suppress low-frequency rumble while preserving a whispered voice, or eliminate high-frequency hiss while keeping the natural sibilance in speech.
What RNNoise is excellent at:
- Consistent background hum (HVAC, fan noise, electrical hum)
- Traffic noise and urban ambient sound
- Keyboard and mouse clicks
- Background music (to a degree)
- Room reverberation reduction
What it struggles with:
- Noise that sounds very similar to voice (some speech-like TV audio in background, for example)
- Extremely loud impulse noise directly into the mic
- Processing music with high fidelity (it’s tuned for speech, not music)
- Situations where the voice itself is very quiet relative to noise
How to Actually Use RNNoise
This is where most guides fail you. They describe the technology, maybe link to the GitHub repo, and leave you staring at a C library wondering what to do next. Let me walk you through the real paths.
Option 1: NVIDIA RTX Voice / NVIDIA Broadcast (Windows, Easiest)
If you have an NVIDIA RTX GPU, this is genuinely the easiest route. NVIDIA Broadcast includes AI noise suppression built on a similar neural network approach. You install it, point it at your microphone, and use the virtual “NVIDIA RTX Microphone” as your audio input in any application.
The reason I mention this in an RNNoise article: the underlying principle is identical, and for Windows users on RTX hardware, this is the most polished experience available. Zero configuration, works everywhere.
Option 2: EasyEffects (Linux — My Personal Setup)
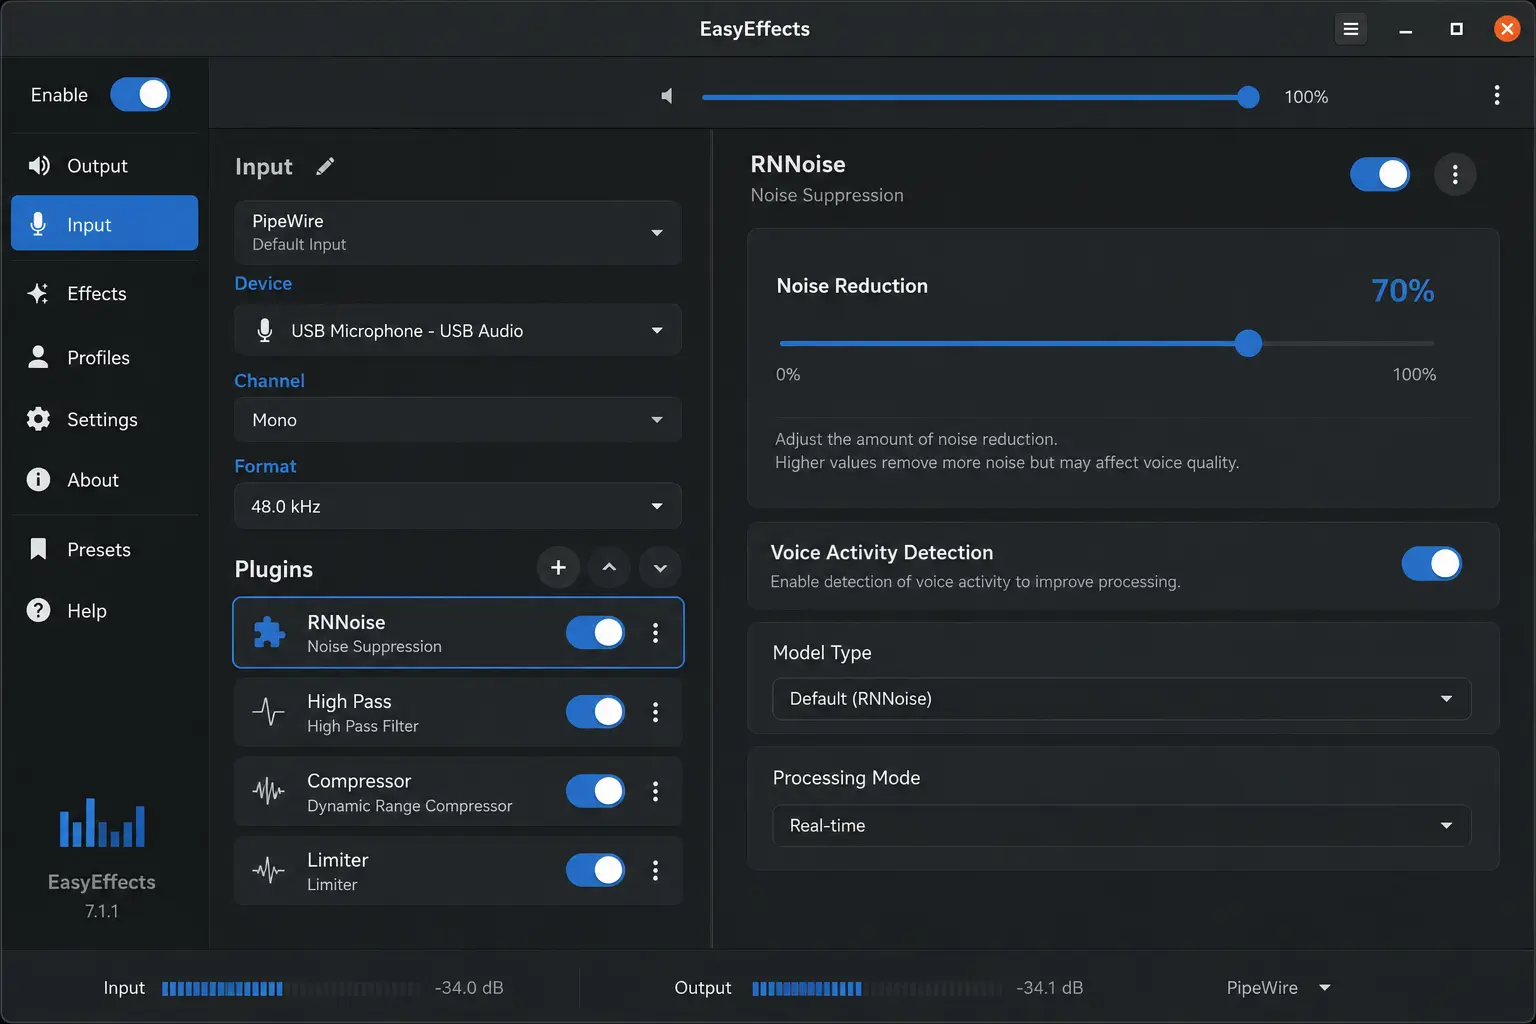
If you’re on Linux (I moved to Ubuntu for my home studio machine after years on Windows), EasyEffects is the crown jewel. It’s a PipeWire audio effects suite that includes RNNoise as a built-in plugin, configurable with a clean GTK interface.
Installation on Ubuntu/Debian:
sudo apt install easyeffects
Once installed, open EasyEffects, go to your input device, and add the RNNoise plugin from the effects chain. You’ll see a single slider for the noise reduction intensity. I run mine around 70% — enough to eliminate the background hum completely without introducing the slightly “underwater” artefacting that appears at 100%.
The real magic: EasyEffects creates virtual audio devices. Your system sees a clean “EasyEffects Source” microphone that already has noise suppression applied. Every application — OBS, Zoom, Discord, your DAW — gets the clean signal automatically. You configure it once and forget about it.
Option 3: Noise Suppression for Voice (OBS Plugin)
If you stream or record video content, there’s a dedicated OBS plugin called obs-noise-suppression (also listed as “Noise Suppression (RNNoise)” in newer OBS versions) that integrates directly into the OBS audio filter chain.
In OBS: Click the gear icon on your microphone source → Filters → Add → Noise Suppression → Select RNNoise.
This is my recommended path for streamers specifically because it keeps the processing inside OBS, which means your system audio and communication apps remain unaffected. Clean separation of concerns.
Option 4: Krisp.ai and NVIDIA RTX Alternatives
Krisp deserves mention as a commercial product built on similar neural noise suppression technology. Unlike RNNoise, Krisp also suppresses noise on the other side of the call — you hear less of the person’s background noise too. For heavy call volume (customer support, sales calls, remote consulting), Krisp’s paid plan is worth evaluating. RNNoise is free and open-source; Krisp is polished and bidirectional. Different tools for different needs.
Option 5: The Raw Library (For Developers)
If you want to integrate RNNoise into your own software or process audio files programmatically, the C library is the foundation:
git clone https://github.com/xiph/rnnoise
cd rnnoise
./autogen.sh
./configure
make
The API is intentionally minimal: you pass in 480-sample frames of 16-bit PCM audio at 48kHz, you get processed frames back. That’s it. The model is baked into the library — no external files to manage, no configuration.
For Python users, the rnnoise-python package wraps the library:
pip install rnnoise-python
This is particularly useful for batch processing recorded audio — podcast editing, transcription preprocessing, voiceover cleanup.
Use RNNoise Online — No Setup Required
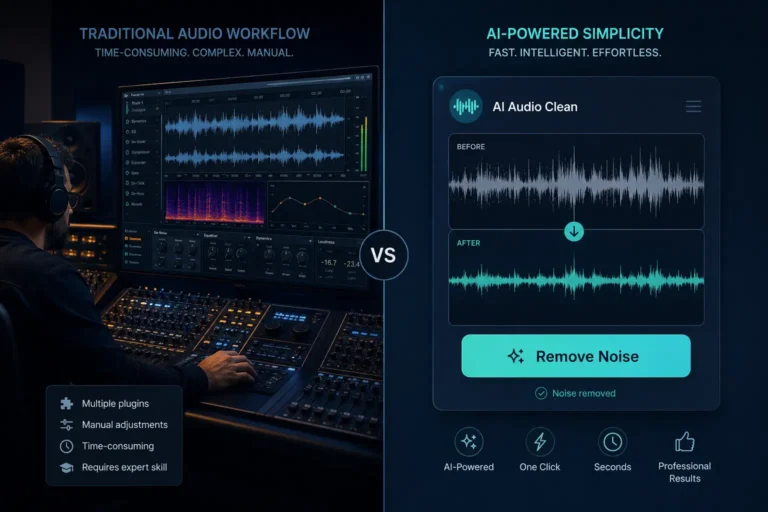
If installing libraries or configuring audio pipelines isn’t your thing, there’s a simpler path. Noise Reducer AI is a free browser-based tool powered by the same AI noise suppression technology as RNNoise. Upload any MP3, WAV, MP4, or MOV file — the AI removes background noise automatically and gives you a clean file to download. No GPU required, no terminal commands, works on any device. Remove background noise free →
Real-World Performance: What To Actually Expect
I want to be honest here because I’ve read too many “RNNoise is magic, all noise problems solved” articles that set unrealistic expectations.
My honest results after two years of daily use:
The mechanical hum from my neighbour’s garage? Gone. Completely eliminated. The kind of low-frequency broadband noise that RNNoise was practically built for. My recordings sound like they were made in a professional studio rather than next to a workshop.
Keyboard noise from my mechanical keyboard (a very clicky one, I know, I know) is reduced by probably 60–70%. Not eliminated. If I’m hammering keys rapidly during a quiet moment in a podcast, listeners can still occasionally hear something. I’ve since switched to a quieter keyboard for recording sessions, which the noise suppression now handles perfectly.
Air conditioning cycling on and off — this was a real problem for me in summer. Traditional noise profiles fail here because the noise changes. RNNoise handles it elegantly because it doesn’t need a static profile; it classifies noise in real time.
The one area where I’ve had to manage expectations: My voice when I’m tired. Late-night recording sessions, post-long-day fatigue — my voice drops in both pitch and energy, and I’ve noticed RNNoise occasionally over-suppresses quiet passages, giving them a slightly processed quality. Bumping the suppression down from 70% to 50% during late sessions fixes this completely.
RNNoise vs. Alternatives: An Honest Comparison
Tool | Cost | Platform | Bidirectional | Best For |
|---|---|---|---|---|
RNNoise | Free | Linux, Windows, macOS | No | Tech-comfortable users, content creators |
NVIDIA Broadcast | Free (RTX required) | Windows | No | Windows gamers/streamers |
Krisp | Free tier / ~$8/mo | Win, Mac | Yes | Professional calls |
Adobe Enhance | ~$5/post | Web | N/A | Post-production podcast cleanup |
iZotope RX | $99–$399 | Win, Mac | N/A | Professional audio post |
Noise Reducer AI | Free / Paid | Web, Android, iOS | No | Easiest online option, no install |
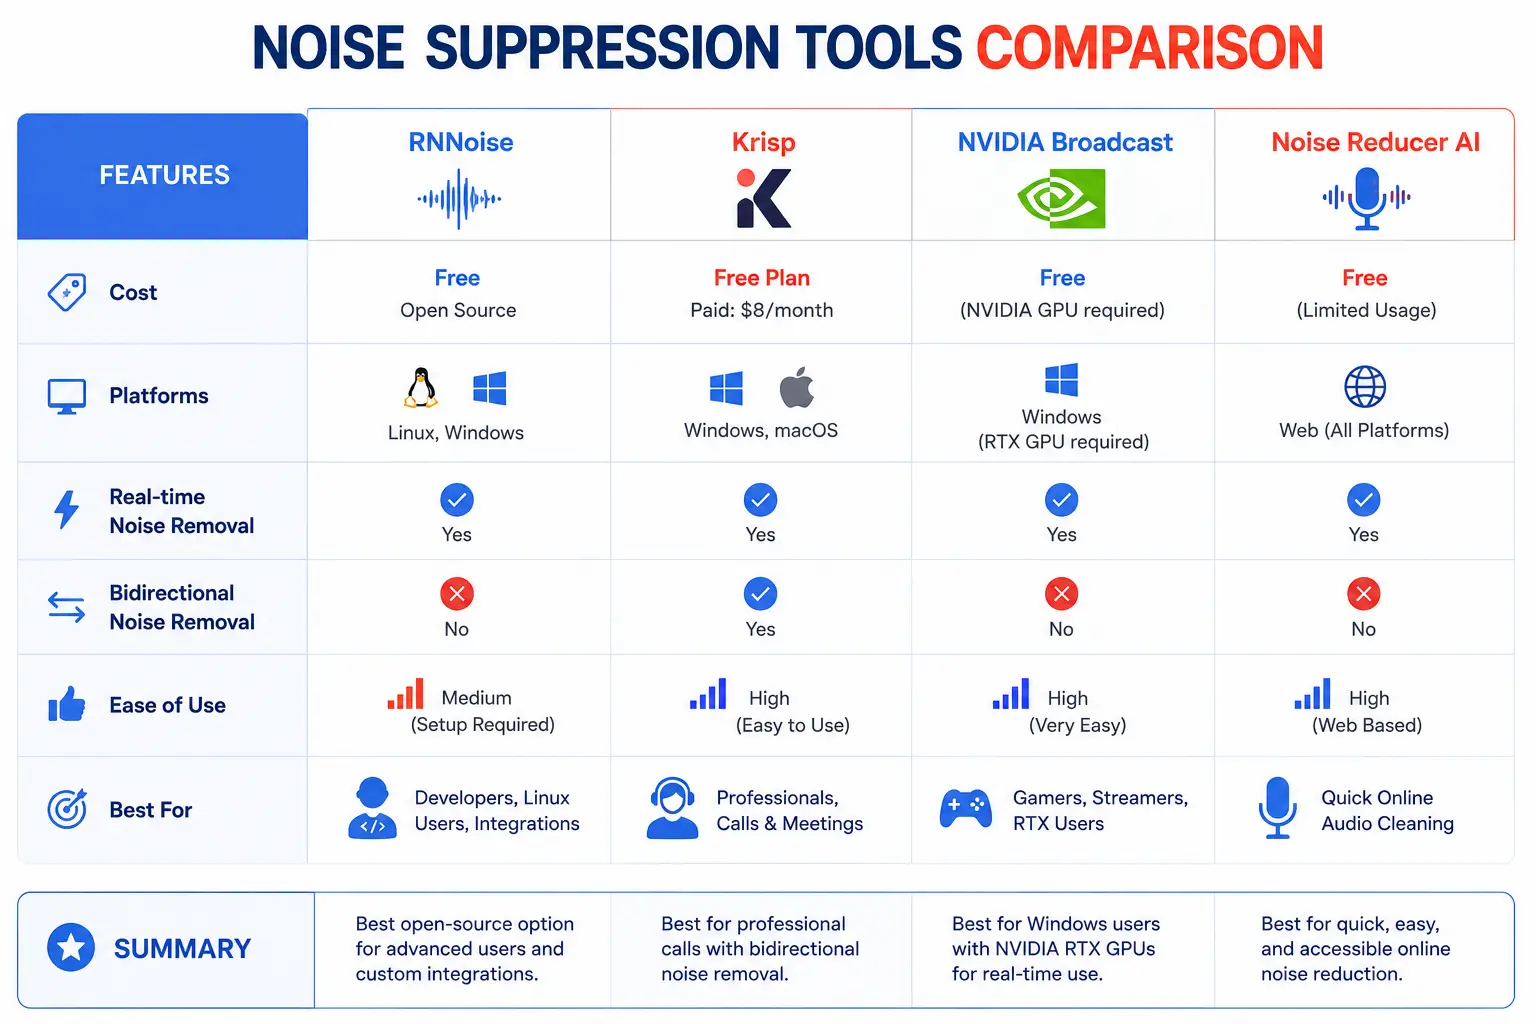
RNNoise wins definitively on cost and on Linux support. For post-production cleanup of existing files, iZotope RX is in a different league entirely. For professional calls where you want bidirectional noise suppression, Krisp is the better tool. Know what you need before you choose.
Tips I’ve Learned the Hard Way
Don’t chain it with a noise gate. A noise gate after RNNoise might seem like double protection, but in practice it creates unnatural cut-offs in quieter speech. RNNoise’s output is already clean; the gate ends up chopping the tail of your words. I spent three months wondering why my recordings sounded “clipped” before I diagnosed this.
Feed it a strong signal. RNNoise doesn’t amplify your voice — it attenuates noise. If your microphone level is set too low, RNNoise will suppress the noise but your voice will also be quiet, and boosting the signal afterward re-introduces some noise floor. Set your input gain so your voice peaks around -12dB before applying noise suppression.
Test with your actual noise, not demo samples. The demos on the RNNoise website are impressive, but your noise profile might behave differently. Record 30 seconds of your room with and without noise suppression and critically listen back before assuming it’s working as expected.
EasyEffects preset backup. If you’re on Linux and you dial in a configuration you love, export the EasyEffects preset immediately. I lost two hours of configuration when I accidentally reset my audio settings during a system update. Lesson learned.
The Bigger Picture: Why Neural Noise Suppression Matters
There’s something quietly significant about a free, open-source project like RNNoise existing in the world.
Professional audio treatment used to require dedicated recording spaces, expensive acoustic panels, professional voiceover studios charging $200/hour. The knowledge and tooling were gatekept behind professional production workflows. RNNoise, and the wave of neural noise suppression tools it inspired, democratised something real — the ability to sound professional from a bedroom, a home office, a cafe, a moving train.
For content creators, educators, remote workers, and anyone for whom clear audio communication matters (which is everyone, increasingly), these tools have quietly raised the floor of what’s achievable without professional resources.
Jean-Marc Valin wrote in a 2018 blog post about RNNoise that one of his motivations was making good audio quality accessible. Two years of using his tool in daily work, I can say: it works. Really works.
Getting Started: Your First 15 Minutes with RNNoise
- Identify your platform: Linux → EasyEffects. Windows streaming → OBS plugin or NVIDIA Broadcast. Mac → Krisp or similar (native RNNoise support is more limited on macOS without additional wrapping).
- Install and configure. On Linux,
sudo apt install easyeffects, add RNNoise plugin, start at 60% intensity. - Record a before/after test. Record 30 seconds with background noise present, once without suppression and once with. Listen critically. The difference should be immediate.
- Adjust intensity. If you hear artefacting (a metallic or underwater quality to your voice), reduce the suppression percentage. If noise is still present, increase it. 60–75% covers most situations.
- Check your whole signal chain. RNNoise is one piece. A good mic placement, a reasonable input gain level, and a room with some soft furnishings (books, carpets, sofas) will let RNNoise do its best work.
RNNoise vs. DeepFilterNet: Which One Should You Actually Use?
This is the question I get asked most often now, and it deserves a real answer rather than a hedge.
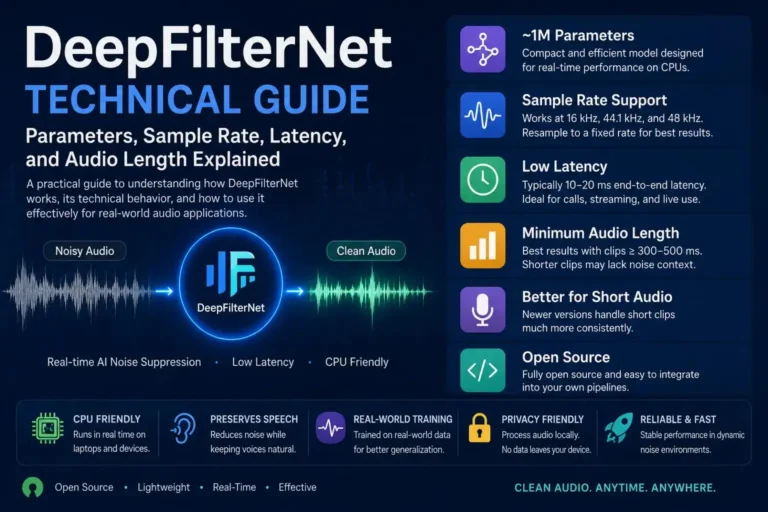
DeepFilterNet is a noise suppression framework developed by researchers at the University of Erlangen-Nuremberg in Germany. Where RNNoise uses a relatively compact GRU-based neural network operating across 22 perceptual frequency bands, DeepFilterNet uses a more sophisticated approach called deep filtering — it predicts complex suppression filters for every individual frequency bin in the spectrogram, giving it much finer-grained control over what gets suppressed and what gets preserved.
The current version, DeepFilterNet3, is the one worth comparing against RNNoise in real-world use.
The Numbers Tell Part of the Story
Audio quality is measured using two standard metrics: PESQ (Perceptual Evaluation of Speech Quality, where higher is better, max ~4.5) and STOI (Short-Time Objective Intelligibility, where 1.0 is perfect).
Metric | RNNoise | DeepFilterNet3 |
|---|---|---|
PESQ Score | ~3.88 | 3.5–4.0+ |
~0.92 | 0.95+ | |
10–20ms | 10–20ms | |
Model Size | ~60k parameters | Much larger |
CPU Load | Very light | Moderate |
On paper, DeepFilterNet3 wins on speech quality — particularly on complex, non-stationary noise (the kind that changes unpredictably, like crowd noise, synthetic AI voices in the background, or overlapping conversations). Research comparing the two found that DeepFilterNet3 showed superior generalisation while RNNoise demonstrated impressive denoising capabilities with lower model complexity. But numbers only go so far.
Where I Personally Landed
I ran both tools on my setup for about three weeks — same microphone, same room, same neighbour’s garage in the background — alternating between RNNoise at 70% in EasyEffects and DeepFilterNet3 via its PipeWire plugin.
My honest take: for my specific noise problem (low-frequency mechanical hum), the real-world difference was smaller than the benchmarks suggest. Both tools eliminated the hum completely. DeepFilterNet3 handled the occasional keyboard click slightly more cleanly, and in A/B listening tests, my voice sounded marginally more natural through DeepFilterNet3 — less of the subtle “processed” quality that RNNoise introduces at high suppression levels.
Where DeepFilterNet3 genuinely pulled ahead was in a specific scenario: recording a podcast episode while my partner was watching TV in the next room. The television audio — which sounds somewhat like speech — is exactly the kind of complex noise that RNNoise struggles with. DeepFilterNet3 handled it noticeably better, suppressing the TV audio while leaving my voice intact.
One real-world account described DeepFilterNet as eliminating “virtually everything that isn’t a human voice, be it white noise or harmonics” — noting that you could even play guitar in the background during a call without it bleeding through. That tracks with my experience.
The Trade-offs That Matter
DeepFilterNet3 requires more CPU. On my Linux machine (a mid-range Ryzen 5), I noticed a slight increase in CPU usage — nothing that caused issues, but measurable. On lower-powered devices (older laptops, Raspberry Pi setups, single-board computers), RNNoise’s extreme efficiency becomes a genuine advantage. RNNoise remains the lighter option on older hardware, but on modern devices, DeepFilterNet3’s quality advantage makes it the better choice for most users who prioritise clarity.
DeepFilterNet3 has a minimum audio length consideration. The model needs at least 80–100ms of audio context to work effectively. For continuous speech this is irrelevant, but for very short audio clips or burst processing, RNNoise handles short segments more gracefully.
RNNoise is more universally integrated. It’s baked into OBS, EasyEffects, Discord, and dozens of other tools. DeepFilterNet3 requires a bit more setup — typically via the df command-line tool, the PipeWire plugin, or direct Python integration. Not difficult, but not one-click either.
The Practical Decision Guide
Choose RNNoise if:
- You’re on low-powered hardware
- You want zero-configuration through existing tools (OBS, Discord, EasyEffects)
- Your noise is primarily consistent background hum or basic ambient noise
- You’re building something that needs an embeddable, lightweight library
Choose DeepFilterNet3 if:
- You’re on a modern CPU and quality is the priority
- Your noise environment is complex or variable (TV in background, crowd noise, multiple sound sources)
- You’re doing post-production cleanup of recorded files
- You’ve tried RNNoise and found it leaves artefacts at the suppression level you need
The honest summary: RNNoise is the reliable workhorse that integrates everywhere and just works. DeepFilterNet3 is the audiophile upgrade — meaningfully better in complex noise situations, at the cost of more setup and slightly higher resource use. For most home studio and remote work use cases, either will transform your audio. For demanding scenarios where audio quality is paramount, DeepFilterNet3 is worth the extra effort.
Final Thoughts
The best audio setup is the one that removes friction from your workflow without requiring constant attention. After two years, RNNoise has done exactly that for me. It runs silently in the background, my callers hear a clean signal, my recordings don’t require hours of post-production noise reduction, and I haven’t thought about the mechanical hum from next door in months.
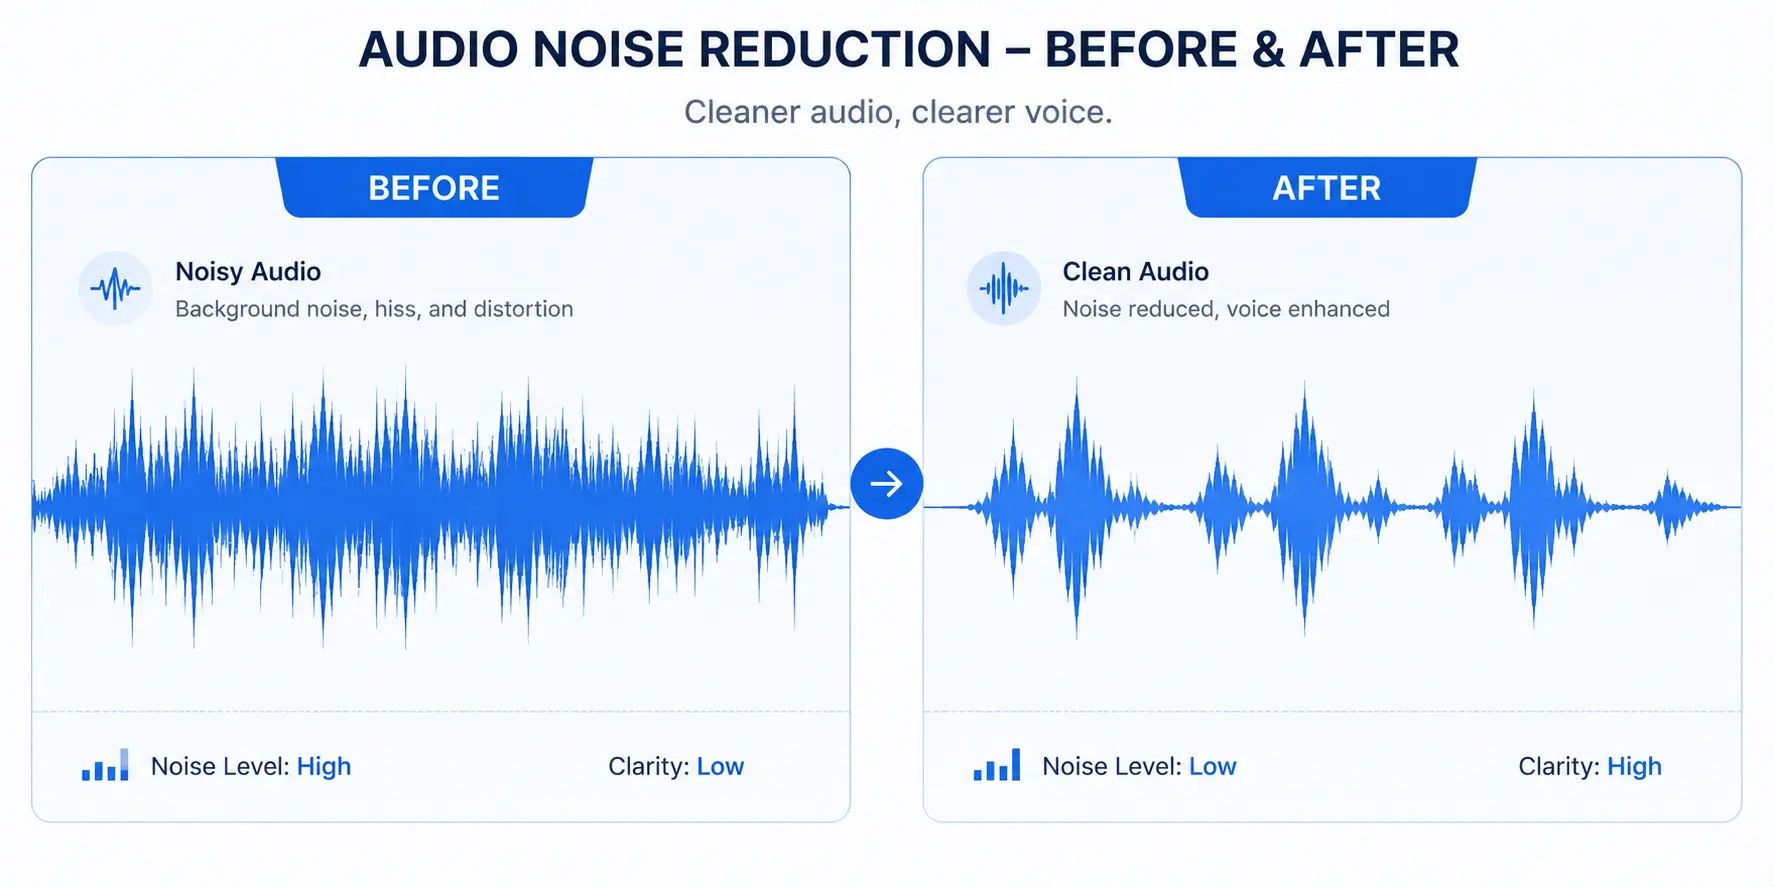
If you’re still fighting background noise in 2026 and haven’t tried RNNoise, the question is simply: what are you waiting for?
The library is free, the documentation is honest about its limitations, and the results — for the right use case — are genuinely remarkable. It’s one of those rare open-source tools where the engineering is so good that you forget it’s there.
And that, ultimately, is exactly what good audio technology should feel like. Don’t want to install anything? Noise Reducer AI removes background noise from any audio or video file in seconds — free, browser-based, no setup required. Powered by the same AI technology as RNNoise. Clean Your Audio Free →
Have questions about setting up RNNoise in your specific workflow? Drop them in the comments. I’ve probably tried the configuration you’re thinking about.

Noise Reducer AI is an AI-powered audio enhancement platform designed to remove background noise, improve voice clarity, and enhance sound quality. Built for creators, professionals, and everyday users, it offers a fast, free, and easy way to clean audio without technical complexity.
Frequently Asked Questions
Check out these frequently asked questions to find quick answers and helpful tips!